Swift3でファイルを読み込む
swiftファイルと同じ場所にある、sample.txtを読み込むコードは以下のようになる。
        let path = Bundle.main.path(forResource: "sample", ofType: "text")!
        if let data = NSData(contentsOfFile: path){
            print(String(NSString(data: data as Data, encoding: String.Encoding.utf8.rawValue)!))
        }else{
            print("データなし")
        }
Capistrano3のコードを読んでみる1 ~設定ファイルのパス設定~
Capistranoを実行時に利用するconfig/deploy.rbとかproduction.rb、staging.rbのパスを変更できるのか気になったのでソースコードを読んでみました。
結論としては、変更可能ですがcapistrano/setupをCapfileでrequireする前にsetする必要があります。
また、Capfileファイルのパスも変えられるかが気になって見てみましたが、capfile、capfile.rb、Capfile.rbにファイル名の変更は可能という結論になりました。
/lib/capistrano/application.rb
色々省略してますが、初期化処理としてcapfileの読み込みを行います。
module Capistrano
  class Application < Rake::Application
    def initialize
      super
      @rakefiles = %w{capfile Capfile capfile.rb Capfile.rb} << capfile
    end

    private

    # allows the `cap install` task to load without a capfile
    def capfile
      File.expand_path(File.join(File.dirname(__FILE__),'..','Capfile'))
    end
  end
end
/lib/capistrano/setup.rb
load 'capistrano/defaults.rb'では、/lib/capistrano/defaults.rbで、setしなかった場合のデフォルト値が定義されています。
load:defaultsをImmutableTask(/lib/capistrano/immutable_task.rb)として定義しているので、CapistranoのタスクでもOverride出来ません。
stage_config_pathやdeploy_config_pathは/lib/capistrano/dsl/paths.rbで定義されています。
configure_backend は/lib/capistrano/configuration.rbで定義されていて、sshkitの設定を行います。
namespace :load do
  task :defaults do
    load 'capistrano/defaults.rb'
  end
end

stages.each do |stage|
  Rake::Task.define_task(stage) do
    set(:stage, stage.to_sym)

    invoke 'load:defaults'
    Rake.application["load:defaults"].extend(Capistrano::ImmutableTask)
    load deploy_config_path
    load stage_config_path.join("#{stage}.rb")
    load "capistrano/#{fetch(:scm)}.rb"
    I18n.locale = fetch(:locale, :en)
    configure_backend
  end
end

require 'capistrano/dotfile'
setup.rbの最後でrequireしているdotfile.rbの内容は以下のとおりです。
dotfile = Pathname.new(File.join(Dir.home, '.capfile'))
load dotfile if dotfile.file?
/lib/capistrano/install.rb
ファイルの中身は、以下のようになっています。
load File.expand_path(File.join(File.dirname(__FILE__),'tasks/install.rake'))
/lib/capistrano/task/install.rakeを実行しています。
install.rakeはcap install の際に実行される処理が定義されています。
/lib/capistrano/deploy.rb
require 'capistrano/framework'

load File.expand_path("../tasks/deploy.rake", __FILE__)
/lib/capistrano/framewok.rb
以下のように、framework.rakeを呼び出しています。
load File.expand_path("../tasks/framework.rake", __FILE__)
require 'capistrano/install'
task/deploy.rake
task/framework.rakeでは、Capistranoが提供するコマンド(?)のインターフェースが定義されています。
namespace :deploy do

  desc 'Start a deployment, make sure server(s) ready.'
  task :starting do
  end

  desc 'Started'
  task :started do
  end

  #以下、省略
また、:rollback、:deployの処理はここで定義されています。
  #以下、省略

  desc 'Rollback to previous release.'
  task :rollback do
    %w{ starting started
        reverting reverted
        publishing published
        finishing_rollback finished }.each do |task|
      invoke "deploy:#{task}"
    end
  end
end

desc 'Deploy a new release.'
task :deploy do
  set(:deploying, true)
  %w{ starting started
      updating updated
      publishing published
      finishing finished }.each do |task|
    invoke "deploy:#{task}"
  end
end
task default: :deploy
task/framework.rake
task/deploy.rake はtask/framework.rakeで定義してあったインターフェースの実装を担当しています。(全てではないですが)
また、実際の処理はinvokeで処理を委譲しています。
namespace :deploy do

  task :starting do
    invoke 'deploy:check'
    invoke 'deploy:set_previous_revision'
  end

  #以下、省略
Nginxのモジュールの作り方 C言語でHandlers編
概要
モジュールの種類
Nginxで開発できるmoduleの種類は、ざっくりとわけると以下の3種類があります。
- Handlers・・・locationを指定して処理が可能
- Load balancers・・・upstream moduleやload balancer moduleと連携して使う。load balancer moduleにはRound RobinとIP Hashがbuild-inされているけど、それ以外の分散方法として使うことが出来る
- Filters・・・Handlerのレスポンスに対して処理を行う。例えばgzip filterはresponseをgzip圧縮する。
今回対象とするのはHandlersをC言語で実装することにします。
必要となるファイル
特定パスにアクセスしたら『hello world』と出力するようなモジュールを作ってみます。
stub_status moduleのイケてない版のようのモジュールです。
nginxのモジュールを実装するには、最低限2つのファイルが必要になります。
- config
- ngx_http_hello_module.c
configファイルにはモジュールの概要を書き、モジュール実態はngx_http_hello_module.cになります。
動作イメージ
configファイルのserverディテクティブの中に以下のように記載すると、http://localhost/hello/ にアクセスするとHello WorldをHTTP Responseとして返す。
location /hello/ {
   hello 'Hello World';
}
実装
config
configファイルにはモジュールの概要や説明などを書きます。
ngx_addon_name=ngx_http_hello_module
HTTP_MODULES="$HTTP_MODULES ngx_http_hello_module"
NGX_ADDON_SRCS="$NGX_ADDON_SRCS $ngx_addon_dir/ngx_http_hello_module.c"
ngx_addon_nameにはモジュールの名前を書きます。
HTTP_MODULESには依存するモジュールの名前を書きます。
NGIX_ADDON_SRCSにはモジュールのパスを書きます。
HTTP_MODULESの他にどんなModuleがあるかは、auto/modulesのスクリプトを見るとわかります。
1.9.2では以下のように書かれています。
459     modules="$modules $HTTP_MODULES $HTTP_FILTER_MODULES \
460              $HTTP_HEADERS_FILTER_MODULE \
461              $HTTP_AUX_FILTER_MODULES \
462              $HTTP_COPY_FILTER_MODULE \
463              $HTTP_RANGE_BODY_FILTER_MODULE \
464              $HTTP_NOT_MODIFIED_FILTER_MODULE"
module.c
コンフィグファイルの定義
NginxのConfigファイルのどのディテクティブ(main, server, location)で、このモジュールの設定が定義出来るか決めます。
ngx_http<モジュール名>(main|srv|loc)_conf_t という構造体で、ディレクティブの設定値を保存する構造体を定義します。
その他のngx_http_core_loc_conf_tなどの定義は、src/core/ngx_config.h にある。
ngx_str_t のような型は、src/core/nginx_config.h にある。
typedef struct {
  ngx_str_t   name;
} ngx_http_hello_loc_conf_t;
ディテクティブに具体的にどんな内容を書くかは以下のように定義します。
static ngx_conf_post_handler_pt ngx_http_hello_p = ngx_http_hello;

static ngx_command_t ngx_http_hello_commands[] = {
  {
    ngx_string("hello"),
    NGX_HTTP_LOC_CONF|NGX_CONF_TAKE1,
    ngx_conf_set_str_slot,
    NGX_HTTP_LOC_CONF_OFFSET,
    offsetof(ngx_http_hello_loc_conf_t, name),
    &ngx_http_hello_p
  },
  ngx_null_command
};
このモジュールを利用するには、コンフィグファイル内にhelloというKeyを定義するのが一番最初の『ngx_string("hello")』です。
次の『NGX_HTTP_LOC_CONF|NGX_CONF_TAKE1』は、HTTPのLocationディテクティブで利用し、"hello"が引数を1つ取るということです。
引数の個数についてはsrc/core/ngx_conf_file.h に、コンフィグファイルのどのディテクティブに定義を表するかは src/http/ngx_http_config.h に定義されています。
3番目の『ngx_conf_set_str_slot』引数を取る場合の型を定義するお作法として、関数ポインタを記載します。ここで記載出来る関数名はsrc/core/ngx_conf_file.h の328行目から340行目までに定義されています。
4番目の 『NGX_HTTP_LOC_CONF_OFFSET』はLocationディテクティブの時にはこれを設定します。src/http/ngx_http_config.hの50〜52にsrv、mainの時に設定する関数が定義されています。
5番目では、ngx_http_hello_loc_conf_t->nameに設定
ngx_null_commandは、配列の最後を表します。モジュールとしてhello以外Keyが存在する場合は、ngx_null_commandの前に同様の定義をします。
module contextの設定
ngx_http
ngx_http_hello_create_loc_conf関数で、コンフィグの初期化をしていますが、複数のlocationに対応するような場合にはngx_http
static ngx_http_module_t ngx_http_hello_module_ctx = {
  NULL,                          /* pre configuration */
  NULL,                          /* post configuration */
  NULL,                          /* create main configuration */
  NULL,                          /* init main configuration */
  NULL,                          /* create server configuration */
  NULL,                          /* merge server configuration */
  ngx_http_hello_create_loc_conf, /* create location configuration */
  NULL                           /* merge location configuration */
};

/* The function which initializes memory for the module configuration structure
*/
static void *ngx_http_hello_create_loc_conf(ngx_conf_t *cf)
{
  ngx_http_hello_loc_conf_t  *conf;
  conf = ngx_pcalloc(cf->pool, sizeof(ngx_http_hello_loc_conf_t));
  if (conf == NULL) {
   return NULL;
  }
  return conf;
}
moduleの定義
NGX_MODULE_V1とNGX_MODULE_V1_PADDINGで挟んだ内容がモジュールの定義(ngx_module_t)になります。
それぞれの処理に合わせてコールバック処理登録を登録します。
/*
 * The module which binds the context and commands
 *
 */
ngx_module_t ngx_http_hello_module = {
  NGX_MODULE_V1,
     &ngx_http_hello_module_ctx,    /* module context */
     ngx_http_hello_commands,       /* module directives */
     NGX_HTTP_MODULE,               /* module type(CORE, MAIL, EVENT, ...) */
     NULL,                          /* init master */
     NULL,                          /* init module */
     NULL,                          /* init process */
     NULL,                          /* init thread */
     NULL,                          /* exit thread */
     NULL,                          /* exit process */
     NULL,                          /* exit master */
     NGX_MODULE_V1_PADDING
};
Handler
Handlerでは、リクエストを受けてレスポンスか返すという実質的な処理を実装します。
/*
 * Main handler function of the module.
 */
static ngx_int_t ngx_http_hello_handler(ngx_http_request_t *r)
{
  ngx_int_t    rc;
  ngx_buf_t   *b;
  ngx_chain_t  out;
  /* we response to 'GET' and 'HEAD' requests only */
  if (!(r->method & (NGX_HTTP_GET|NGX_HTTP_HEAD))) {
    return NGX_HTTP_NOT_ALLOWED;
  }

  /* discard request body, since we don't need it here */
  rc = ngx_http_discard_request_body(r);
  if (rc != NGX_OK) {
    return rc;
  }

  /* set the 'Content-type' header */
  r->headers_out.content_type_len = sizeof("text/html") - 1;
  r->headers_out.content_type.data = (u_char *) "text/html";
  /* send the header only, if the request type is http 'HEAD' */
  if (r->method == NGX_HTTP_HEAD) {
    r->headers_out.status = NGX_HTTP_OK;
    r->headers_out.content_length_n = hello_string.len;

    return ngx_http_send_header(r);
  }
  /* allocate a buffer for your response body */
  b = ngx_pcalloc(r->pool, sizeof(ngx_buf_t));
  if (b == NULL) {
    return NGX_HTTP_INTERNAL_SERVER_ERROR;
  }
  /* attach this buffer to the buffer chain */
  out.buf = b;
  out.next = NULL;

  /* adjust the pointers of the buffer */
  b->pos = hello_string.data;
  b->last = hello_string.data + hello_string.len;
  b->memory = 1;    /* this buffer is in memory */
  b->last_buf = 1;  /* this is the last buffer in the buffer chain */
  /* set the status line */
  r->headers_out.status = NGX_HTTP_OK;
  r->headers_out.content_length_n = hello_string.len;
  /* send the headers of your response */
  rc = ngx_http_send_header(r);
  if (rc == NGX_ERROR || rc > NGX_OK || r->header_only) {
    return rc;
  }

  /* send the buffer chain of your response */
  return ngx_http_output_filter(r, &out);
}
ビルドしてみる
モジュールのソースコードを配備します。
~# mkdir /usr/local/src/ngx_http_hello_module
~# ls /usr/local/src/ngx_http_hello_module
config  ngx_http_hello_module.c
nginx-buildの0.4.0以降を使ってビルドします。
~# useradd --shell /sbin/nologin nginx
~# apt-get update
~# apt-get install gcc make
~# wget https://github.com/cubicdaiya/nginx-build/releases/download/v0.4.1/nginx-build-linux-amd64-0.4.1.tar.gz
~# tar xvfz nginx-build-linux-amd64-0.4.1.tar.gz
~# chmod +x nginx-build
~# ./nginx-build -d work -pcre -zlib -openssl -verbose --sbin-path=/usr/sbin/nginx --conf-path=/etc/nginx/nginx.conf --error-log-path=/var/log/nginx/error.log --pid-path=/var/run/nginx.pid --lock-path=/var/lock/nginx.lock --http-log-path=/var/log/nginx/access.log --with-http_stub_status_module --with-debug --add-module=/usr/local/src/ngx_http_hello_module
~# cd work/1.9.2/nginx-1.9.2/
~/work/1.9.2/nginx-1.9.2# make install
~#  /usr/sbin/nginx -c /etc/nginx/nginx.conf
ソースコードはhideji/ngx_http_hello_module · GitHubにあります。
起動スクリプトを利用る場合はJasonGiedymin/nginx-init-ubuntu · GitHubを参照してください。
参考資料
簡単なHandlerの作り方は以下が参考になります。
TerraformをDigital Oceanで試してみる3 - provisionerにchefを使う
Terraformのprovisionerとしてchefを使うにはChefサーバが必要になります。
Chefサーバの準備が面倒な場合は、Hosted Chefで代用できます。Hosted Chefの設定については前回の記事が参考にしてください。
Chef Clientのインストール
provisionerにChefを指定したときに、skip_installをtrueにしなければ(デフォルトではfalse)Chef Clientをインストールできますが、remote-execを利用してChef Clientをインストールします。
inlineに実行したいコマンドを指定するので、ここではOmnibus Installerを実行します。
remote-execではConnectionを指定してSSHで接続出来るようにします。
    provisioner "remote-exec" {
        inline = [
        "curl -L https://www.chef.io/chef/install.sh | sudo bash"
        ]

        connection {
            user = "root"
        type = "ssh"
            key_file = "${var.ssh_key_file}"
    }
    }
key_fileで指定する鍵ファイルはdecryptされている必要があります。decryptしていない場合は以下の様なエラーがでます。
digitalocean_droplet.node-1: Provisioning with 'remote-exec'...
digitalocean_droplet.node-1: Error: 1 error(s) occurred:

* Failed to read key '/Users/username/.ssh/id_rsa': password protected keys are
not supported. Please decrypt the key prior to use.
Error applying plan:

1 error(s) occurred:

* 1 error(s) occurred:

* 1 error(s) occurred:

* Failed to read key '/Users/username/.ssh/id_rsa': password protected keys are
not supported. Please decrypt the key prior to use.

Terraform does not automatically rollback in the face of errors.
Instead, your Terraform state file has been partially updated with
any resources that successfully completed. Please address the error
above and apply again to incrementally change your infrastructure.
その場合は以下のコマンドでdecryptします。
openssl rsa -in <Encrypted key filename> -out < desired output file name>
Chefの実行
provisionerとしてchefを利用します。
Chef Serverを使う必要が有るため事前にChef Serverを利用できるようにする必要があります。
ここでは、CookBookとしてgetting-startedを指定しています。
getting-startedを使う場合はattributesは利用しないので設定不要ですが、サンプルとして記述しています。
また、Terraform v0.5.2ではchef provisionerはterraform.tfvarsに定義した値を使えない※ようなので直接値を書きます。
※変数名が定義した文字列にならず、変数名のままchef-clientに渡っているようなエラーがでます。
    provisioner "chef"  {
        attributes {
            "key" = "value"
            "app" {
                "cluster1" {
                    "nodes" = ["webserver1", "webserver2"]
                }
            }
        }
        environment = "_default"
        run_list = ["getting-started"]
        node_name = "node-1"
        server_url = "https://api.opscode.com/organizations/"
        validation_client_name = "Organazation名-validator"
        validation_key_path = "./Organazation名-validator.pem"
        skip_install = true

        connection {
            user = "root"
            type = "ssh"
            key_file = "${var.ssh_key_file}"
        }
    }
注意すべき点としては、destroyしてもChef Server側に登録されたnode(node_name)は削除されないので別途削除する必要があります。
作成されたnodeを削除しないでterraform applyを再度実行した場合は、以下の様なエラーが表示されます。
ocean_droplet.node-1 (chef): Creating a new client identity for node-1 using the validator key.
digitalocean_droplet.node-1 (chef):
digitalocean_droplet.node-1 (chef): ================================================================================
digitalocean_droplet.node-1 (chef): Chef encountered an error attempting to create the client "node-1"
digitalocean_droplet.node-1 (chef): ================================================================================

digitalocean_droplet.node-1 (chef): Authorization Error:
digitalocean_droplet.node-1 (chef): --------------------
digitalocean_droplet.node-1 (chef): Your validation client is not authorized to create the client for this node (HTTP 403).
digitalocean_droplet.node-1 (chef):
digitalocean_droplet.node-1 (chef): Possible Causes:
digitalocean_droplet.node-1 (chef): ----------------
digitalocean_droplet.node-1 (chef): * There may already be a client named "node-1"
digitalocean_droplet.node-1 (chef): * Your validation client (Organization名-validator) may have misconfigured authorization permissions.
digitalocean_droplet.node-1 (chef):
digitalocean_droplet.node-1 (chef): [2015-06-13T07:26:44-04:00] FATAL: Stacktrace dumped to /var/chef/cache/chef-stacktrace.out
digitalocean_droplet.node-1 (chef): Chef Client failed. 0 resources updated in 3.789611695 seconds
digitalocean_droplet.node-1 (chef): [2015-06-13T07:26:44-04:00] ERROR: 403 "Forbidden"
digitalocean_droplet.node-1 (chef): [2015-06-13T07:26:44-04:00] FATAL: Chef::Exceptions::ChildConvergeError: Chef run process exited unsuccessfully (exit code 1)
digitalocean_droplet.node-1: Error: 1 error(s) occurred:

* Command "chef-client -j \"/etc/chef/first-boot.json\" -E \"_default\"" exited with non-zero exit status: 1
Error applying plan:

1 error(s) occurred:

* 1 error(s) occurred:

* 1 error(s) occurred:

* Command "chef-client -j \"/etc/chef/first-boot.json\" -E \"_default\"" exited with non-zero exit status: 1

Terraform does not automatically rollback in the face of errors.
Instead, your Terraform state file has been partially updated with
any resources that successfully completed. Please address the error
above and apply again to incrementally change your infrastructure.
do.tfファイル、variables.tf
最終的な do.tfは以下のようになります
provider "digitalocean" {
      token = "${var.digitalocean_token}"
}

resource "digitalocean_droplet" "node-1" {
     image = "ubuntu-14-04-x64"
     name = "node-1"
     region = "sgp1"
     size = "512mb"
     ssh_keys = [${var.ssh_key_id}]

    provisioner "remote-exec" {
        inline = [
        "curl -L https://www.chef.io/chef/install.sh | sudo bash"
        ]

        connection {
            user = "root"
            type = "ssh"
            key_file = "${var.ssh_key_file}"
        }
    }

    provisioner "chef"  {
        attributes {
            "key" = "value"
            "app" {
                "cluster1" {
                    "nodes" = ["webserver1", "webserver2"]
                }
            }
        }

        environment = "_default"
        run_list = ["getting-started"]
        node_name = "node-1"
        server_url = "https://api.opscode.com/organizations/"
        validation_client_name = "Organazation名-validator"
        validation_key_path = "./Organazation名-validator.pem"
        skip_install = true

        connection {
            user = "root"
            type = "ssh"
            key_file = "${var.ssh_key_file}"
        }
    }
}
variables.tfとterraform.tfvarsは前回から変更は無いです。
Hosted Chefを使ってみる
サーバがインターネットに接続可能でChefサーバを建てるまではないけど、少しChefサーバを使ってみたいというようなときにHosted Chefが便利なので使ってみました。
Chef 12のオープンソース版と25ノード制限について を見ると、5ノードまでは問題なく使えるようなのでちょっとした確認には使うことが出来ます。
アカウントが無い場合はStart your free trial of hosted Chef から作ることが出来ます。
以降はログインが完了している前提で記載しています。
HOSTED CHEFでの設定
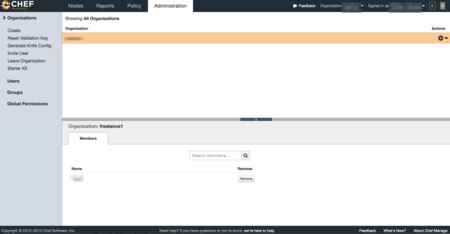
Administration -> Organazationを選択します。

knife.rbの作成
Generate Knife Configを選択すると、kinife.rbが ダウンロード出来ます。
validation_keyのダウンロード
Reset Validation Keyを選択すると、kinife.rbのvalidation_keyにOrganazation名書かれているpemファイル(Organazation名-validator.pem)がダウンロード出来ます。
client_keyのダウンロード
Account Management画面でPassword and Keyのタブを選択して、 Get a New Keyを選択するとpemファイル(ユーザ名.pem)がダウンロード出来ます。
WORKSTATIONでの作業
Starter Kitのダウンロード
CookBookのアプロードやRoleの作成などをWorkStationとして実施するための環境を整えるためにStarter Kitをダウンロードします。 左側のメニューに有るStarter Kitを選択するとダウンロード出来ます。 settings ディレクトリを作成して、kinife.rbとvalidation_key、client_keyを移動します。
これらを実行すると以下の様な構成になります。
.
├── README.md
├── settings
│   ├── Organazation名-validator.pem
│   ├── ユーザ名.pem
│   └── knife.rb
├── cookbooks
│   ├── chefignore
│   └── starter
│       ├── attributes
│       │   └── default.rb
│       ├── files
│       │   └── default
│       │       └── sample.txt
│       ├── metadata.rb
│       ├── recipes
│       │   └── default.rb
│       └── templates
│           └── default
│               └── sample.erb
└── roles
    └── starter.rb
コミュニティCookBookの追加
この状態でsettingsディレクトリでkinife listコマンドを実行する以下のように表示されます。
$ knife client list

Organazation名-validator
chef-repoをgitの管理下にします。
chef-repo$ git init .
chef-repo/.git/

chef-repo$ git add .
chef-repo$ git commit -m "Initial commit"
 11 files changed, 230 insertions(+)
 create mode 100644 README.md
 create mode 100644 settings/Organazation名-validator.pem
 create mode 100644 settings/ユーザ名.pem
 create mode 100644 settings/knife.rb
 create mode 100644 cookbooks/chefignore
 create mode 100644 cookbooks/starter/attributes/default.rb
 create mode 100644 cookbooks/starter/files/default/sample.txt
 create mode 100644 cookbooks/starter/metadata.rb
 create mode 100644 cookbooks/starter/recipes/default.rb
 create mode 100644 cookbooks/starter/templates/default/sample.erb
 create mode 100644 roles/starter.rb
コミュニティCookbookのgetting-startedを追加します。
chef-repo$cd settings
chef-repo/settings$ knife cookbook site install getting-started
  ...省略...
Cookbook getting-started version 0.4.0 successfully installed
Cookbookのアップロード
Cookbookをアップロードします。
chef-repo/settings$ knife cookbook upload --all
ERROR: Chef::Exceptions::MetadataNotValid: Cookbook loaded at path(s) [/home/clavier/Dev/chef/chef-repo/cookbooks/getting-started] has invalid metadata: The `name' attribute is required in cookbook metadata
meatadata.rbやmetadata.jsonにnameの項目がないので、以下の内容を追加します。
chef-repo/settings$ vim ../cookbooks/getting-started/metadata.rb

name 'getting-started'
再度、Cookbookをアップロードします。
chef-repo/settings$ knife cookbook upload --all
Uploading getting-started [0.4.0]
Uploading starter      [1.0.0]
Uploaded all cookbooks.
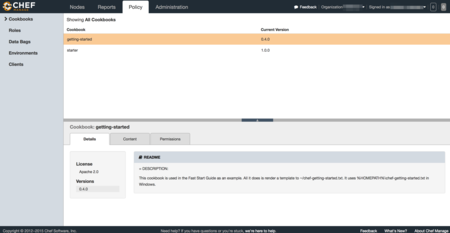
アップロードが完了したCookbookは Policy -> Cookbooks を選択することで確認出来ます。
